Powered By Blogger

Sunday, February 27, 2022

Oddella Fairy mixed media tag


Hello crafters, for this month’s Polkadoodles DT project, I was inspired to use the quirky ‘Oddella Fairy’ digi stamp as I thought the image was perfect for a mixed media project.  To start, I cut and coloured the image with Promarkers and Polychromos Pencils, choosing to work with purples and greys for a more gothic feel, sizing her to fit on a 9.5” tag which I cut from recycled packaging. 

To create texture, I used ‘Distress Texture Paste’ through the Polkadoodles ‘Going Batty’ stencil and cut out 2 bats from the ‘Bat Crazy’ die by Sizzix,  I then cut some random shapes out of card scraps, including gate post shapes, circles and leaves, painting the whole lot, including the tag, in black gesso. 

Once dry, I assembled my composition of shapes on to the tag, without sticking anything down at this stage.  Once I was happy with the composition, I added additional mental embellishments, thick cotton, 3D balls and more texture paste.  I then stuck all the elements down with multi-purpose medium and reapplied black gesso to make sure there was an even covering.

To really bring out the texture, I used metallic waxes in shades of silver, purple and blue over the tag and sprayed seam binding ribbon in ink, fraying the edges to give it a distressed look.  Finally, I secured the fairy used multi-purpose medium and added a sentiment from the ‘Let’s Hang Out Sentiments Bundle - Winnie download bundle’.  I really enjoyed making this month’s project and I hope you like it.

Happy crafting!

Gabrielle

 Polkadoodles Products used
‘Oddella Fairy Ickyink Art alternative’ digistamp
‘Going Batty’ Stencil
‘Let’s Hang Out Sentiments Bundle - Winnie download bundle’


Other Products
Promarkers – Amethyst, Black, Bluebell,  Blossom, Cardinal Red, Cool Grey 3, 4 & 5, Lilac, Lime Green & Vanilla
Copics – Brown
Polychromos Colour Pencils
Sakura Gelly Roll – 08 & Clear Star
Sizzix ‘Bat Crazy’ die
Distress Texture Paste (Matte)
Black Gesso
Dylusions Ink Sprays – Balmy Night & Royal Blue
Metallic Rub-Ons – Sky Blue, Iris, Silver Blue & Golden White
Seam binding ribbon


Friday, February 25, 2022

Angel Heart

I had great fun in creating this mixed media piece using papers, stamps and a stencil, all from Cleverprints. I enjoy working with the different collections, putting them together to create fresh, new pieces. 

Thursday, February 17, 2022

Cleverprints Floral Crackled Hanging Sign

 Hello crafters!

I really enjoyed creating this mixed media hanging sign using the new 'Blooms Framed #1' dies from Cleverprints.  


Here is a list of what you will need:

'Blooms Framed #1' dies,
A wooden substrate of your choice,
Crackle medium of your choice,
Spatula,
Acrylic paints.  I used Paper Artsy chalk paint in 'Moon Light', Dylusions 'Crushed Grape'
Dolly Dimples mixed media card stock,
Spray inks.  I used Dylusions 'Blue |Lagoon', Laidback Lilac', 'Jade' & 'Teal', and Distress Oxide in 'Kitsch Flamingo', Mica Stain in 'Snowflake' and 'Hocus Pocus,
A cardboard box to protect your work surface,
Heat gun,
Gilding Flakes & glue,
A purple & white crayon,
decorative ribbon,
Glue,

The first step was to apply an even coat of my darkest paint to my wooden sign.


Once the paint was dry, apply the Crackle medium.  I used a spatula.


Whilst I was waiting for this to dry thoroughly, I started to make my flowers using my spray inks.  I placed my card in my cardboard box and  sprayed one piece of card with the blue and colours and another piece with the pink and purple colours.  I used a heat gun between layers to stop the colours from blending together too much, but encouraged drips and splodges!  I kept all the flower centres to use in the design, too.


Next, I repeatedly cut out the flower shapes from the die.  Cut out more than you think you will need as you can always use them on another project if you don't end up needing them all.

Once my wooden sign was dry, I painted over it with my lighter paint.  The colour of the darker paint underneath would then show through the cracks.  When this was dry, I highlighted the cracks further by going over them with my purple and white crayons, rubbing it in with my finger.


Now it is time to create your composition.  I didn't stick anything down until I was happy with the design, plus I would then know where I wanted the gilding flakes to be.  I took photographs at sach stage of the composition so that I could refer to the images when I was ready to glue.


I then applied my gilding flakes and adhered all my flowers, and wrapped a decorative ribbon around the string.


I hope you like this project, I certainly had great fun in making it!

Happy Crafting!


Sunday, February 13, 2022

Ula - Be a Mermaid Canvas


I absolutely adore mermaids, so was delighted to work with the ‘Ula Be a Mermaid’ digi stamp from Polkadoodles  for this mixed media canvas.  I coloured the image with Promarkers and added additional sparkle using ‘Waterfall’ and ‘Star Dust’ Stickles.  For the background, I randomly cut some seaweed shapes from copier paper and placed over a plain canvas to use as masks.  I then sprayed the canvas using Dylusions Inks in ‘Blue Lagoon’, ‘Teal’ and ‘Island Parrot’, moving the masks between layers and dabbing off some of the ink with paper towel to create texture.  I then added a part of the corresponding sentiment and glossy accents for bubbles.

Happy Crafting!

Gabrielle, The Papercrafting Pixie


Polkadoodles Products used

Ula be a Mermaid – Life Journal Craft digi download image (image and sentiment)


Promarkers – Blossom, Bluebell, China Blue, Cool Aqua, Gold, Lilac, Pastel Pink, Rose Pink, Tulip Yellow, Vanilla

Copics –Pinkish White

Dylusions Ink Sprays – Blue Lagoon, Island Parrot, Teal

Glossy Accents

Stickles – Star Dust, Waterfall


Tuesday, February 8, 2022

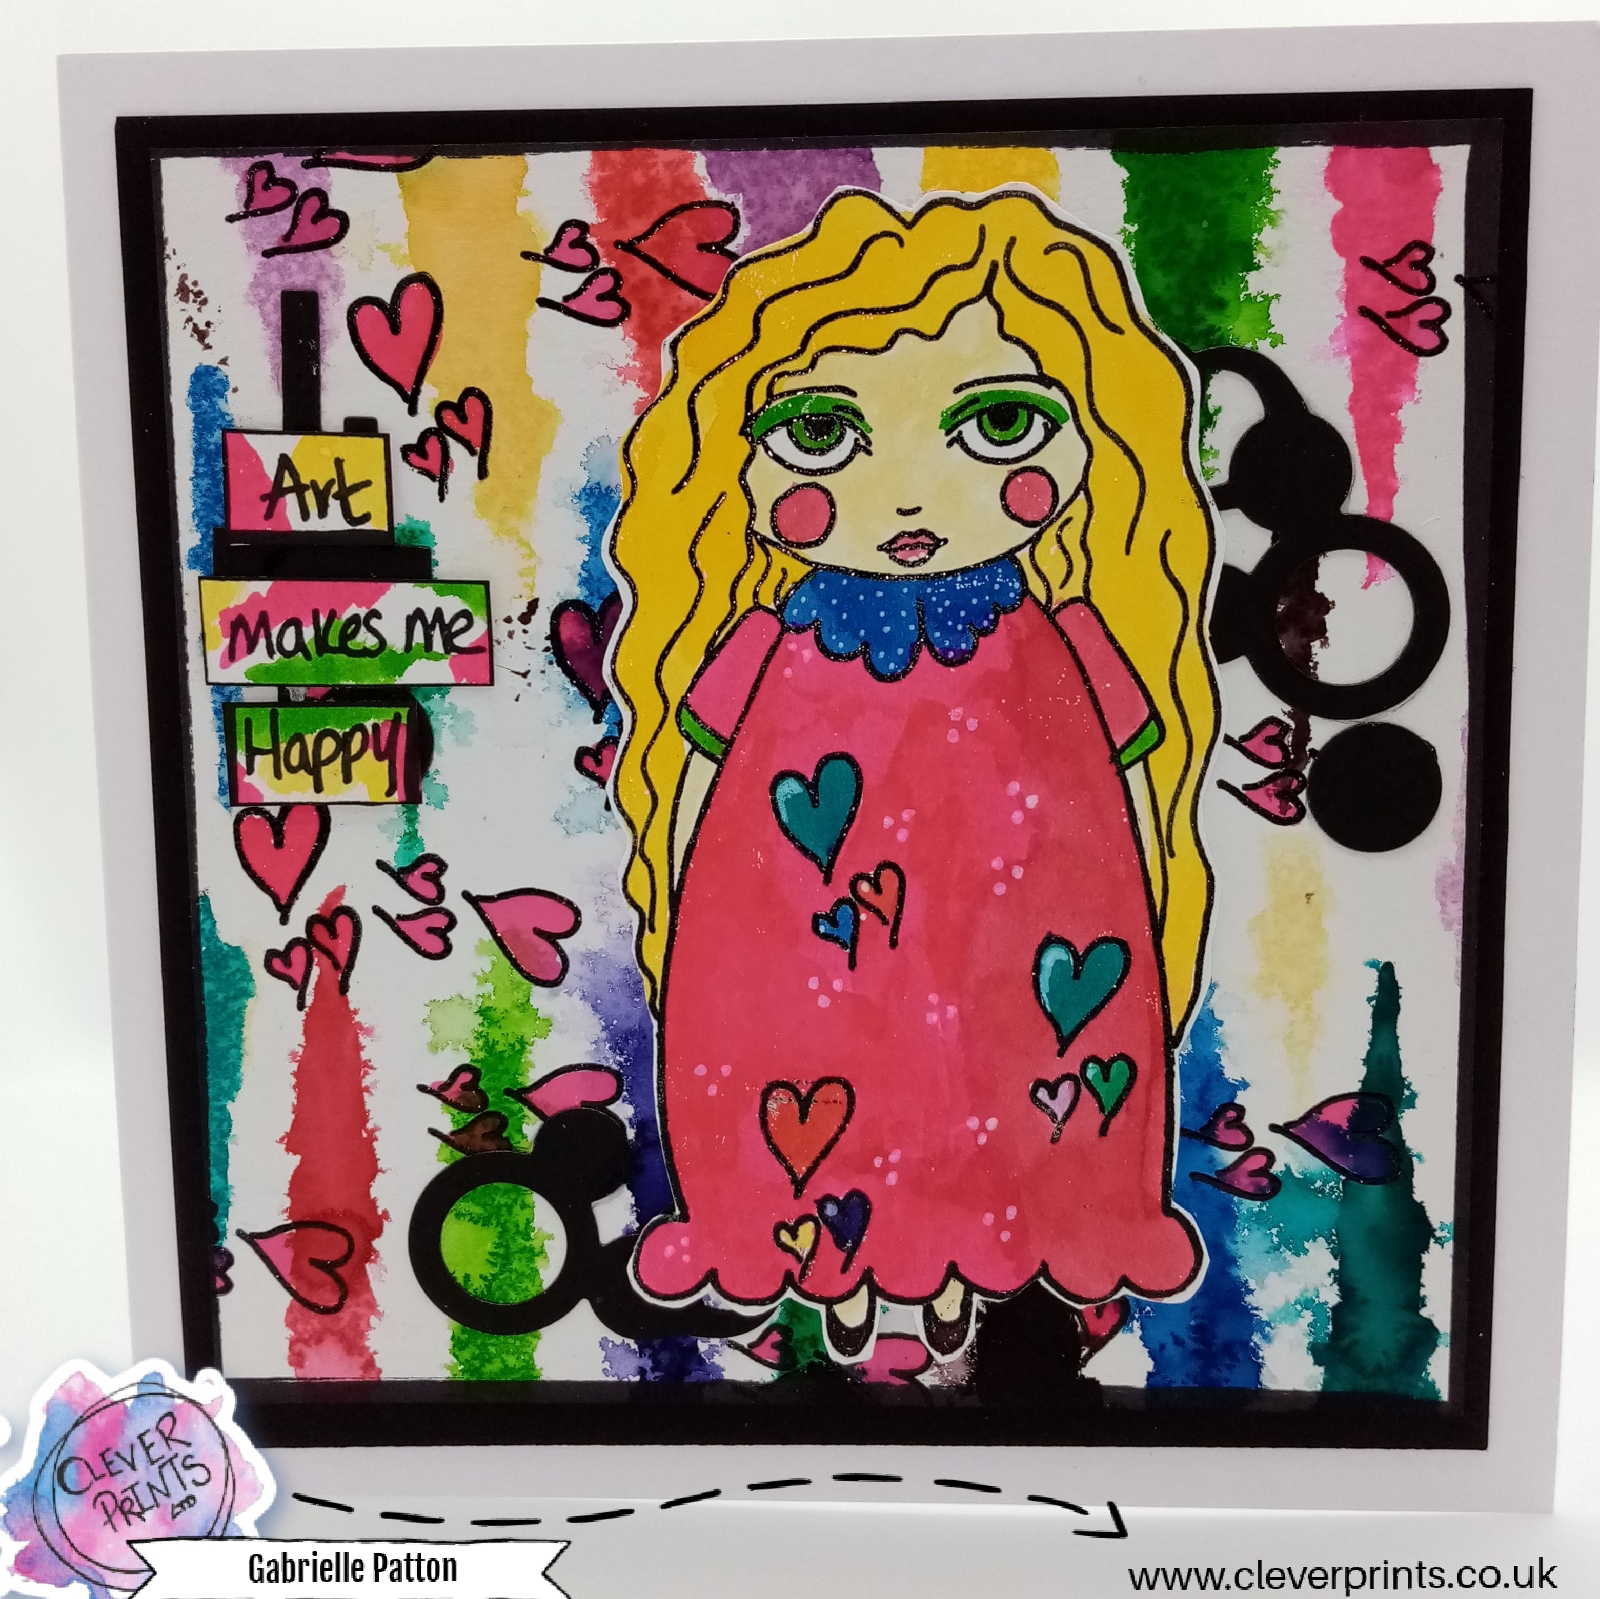
Art Makes Me Happy

I really enjoy going through my stamps and playing with images I've not used for a while and combinining them with new items. For this card I used the cute 'Polly Petals' stamp and 'Abstract Geometry' die set from Cleverprints with my new Jane Davenport Mermaid Markers. The sentiment, which is part of the same stamp set, was perfect for this bright and cheerful design. 

Bright Eyed and Bushy Tailed stamped candle

  For this blog post for Cleverprints, I decided to decorate a candle using stamps.  This is something very simple to do which you can do wi...