Powered By Blogger

Tuesday, October 4, 2022

Bright Eyed and Bushy Tailed stamped candle


For this blog post for Cleverprints, I decided to decorate a candle using stamps.  This is something very simple to do which you can do with any stamp, and you only need a few other items.  You will need:

  • A plain pillar candle
  • Stamps of your choice.  I selected the cute new 'Bright Eyed and Bushy Tailed' stampset from the 'Woodland Creatures' Collection by Jane Royston. 
  • White tissue paper
  • Wax paper
  • stamp and colouring medium.  I used Promarker pens.
  • Stamping platform
  • Scissors
  • Heat tool
Start by cutting the tissue paper to the size of your candle.  Place your tissue paper in your stamping platform and stamp your design.


Remove your tissue paper from the stamping platform and place it on a piece of copier paper.  This makes it easier to see what you are doing when colouring in.  Colour in your satmped images.


Cut away as much excesss tissue paper as you can, being careful not to snip in to your design.


Wrap your tissue paper around your candle and then wrap the wax paper over the top.  Leave enough wax paper around the back of your candle to grip on to.  This makes it much easier to manipulate.

Gently heat the wax paper using your heat tool. moving it around the candle.  Gently peel away the wax paper and you will see if the design has adhered to the candle as it will be smooth and glossy and you will no longer be able to see the tissue paper.


Sunday, August 14, 2022

Whatever is good for your soul, do that! DT post for Polkadoodles.


The ‘Foraging Mushrooms’ digi stamp by Polkadoodles is perfect for home décor and I chose to make a mixed media plaque to hang in a pantry, shed or kitchen.  To start I painted the plaque with a light layer of white gesso and then applied Paper Artsy ‘Hey Presto’ chalk acrylic.  I then used the Polkadoodles ‘Tweet Branches’ stencil with ‘Crushed Olive’ Distress Ink.  I added a green embossing powder to the edges and to create the illusion of grass.

I coloured the main image using Promarkers and used a sentiment and the pre-coloured mushrooms  from the ‘Magic Garden Soup’ collection along with the bees from the ‘Winnie Sunshine Delights’ embellishments collection as they all work so well together. 

This plaque will cheer up any home and remind us to do what is good for the soul.

Happy Crafting!

Gabrielle


Polkadoodles Products used

‘Foraging Mushrooms’ digi stamp

‘Magic Garden Soup’ collection

‘Winnie Sunshine Delights’ embellishments collection

‘Tweet Branches’ Stencil


Paper Artsy ‘Hey Presto’ chalk acrylic

‘Crushed Olive’ Distress Ink

Stamp-n Stuff Embossing Powder ‘Sea Mist Pearls’

Copics –Rose Red

Promarkers – Amethyst, Berry Red, Cinnamon, Forest Green, Grass, Orchid, Pear Green, Purple, Vanilla,

White Sakura Gelly Roll

Sunday, August 7, 2022

Patterned Flowers card with stamps, stencils & dies


Welcome to my blog for my Dseign Team contibution for Cleverprints. For this Inspiration Week, I chose to create a card using bold, bright colours, with stenils, sprays and doodling using Jane's new Patterned Flowers Collection.

To start, take a piece of mixed media card stock & palce in a cardboard box ready for sprying.  This will protect your work space.  Choose your colours, I picked 3 complimentary sprays.  


Lightly spary the card, drying between layers if you wish to build up the layers rather than have a blend.


When you are happy with your background, place your stencil over it and using the same colours, spray through the stencil.  I used the Patterned Borders Stencil.  Again, dry between layers.


Next, cut your piece to size.  I was creating an 8" x 8" card, so cut my piece down to 7.5" x 7.5".  Keep the scraps as these will be used later.

Next, die cut pieces in black card for the border.  I used a glossy black card & the Patterned Flowers Border Die Set.  I cut 3 spearate borders.

Arrange two of these to create a border along two sides.  For the other two sides, cut two equal strips from your left over card. For added interest, cut your third die cut and layer over the top of the two strips.


Place your piece in satmping platform and stamp your image in Memento ink.  I used the Droplet Flower stamp set.


Doodle in yout image with a white and black pen.


Add further detail drwing through the stencil with the same pens.  I hope you enjoyed this blog post and Happy Ctafting!

Sunday, July 31, 2022

Foreever Special Angel


Here is my latest Design Team sample for Polkadoodles. Mixed media is so much fun as you get to combine different mediums and there really are no rules. I used a combination of stamps, stencils, inks, sprays, pens and pencils to make this colourful over-sized tag.  

To start, I made my own tag out a of an A4 sheet of mixed media card stock.   I then sprayed it using a combination of Distress Ink and Distress Oxide sprays.  Once dried I used the ‘Creative Angel ‘ stencil with distress ink pads and stamped the ‘Forever Special Angel’ head stamp with Versa Fine Clair in ‘Nocturne’.  I coloured the skin tone using Caran D’Ache water soluble wax pastel in ‘Salmon’.  I used water soluble Woody pencils for the hair, lips and eyes.   

To add detail to the tag, I used a text stamp from the ‘Vintage Text’, stamp set and a border stamp from the ‘Forever Special Angel’ stamp set, highlighting with a white Sakura pen.  To ground the angel I stamped a leaf border from the ‘Believe’ stamp set and continued with the leaf motif using a large leaf stamp from the ‘Little Kingdom’ stamp set which I coloured using Distress Oxide ink pads.  I wanted to enhance the teal colour from the tag, so I stamped a circular shape from ‘Magic Garden’, colouring it in the same teal blue oxide as the background.

To finish the tag, I stamped the sentiment from the ‘Believe’ stamp set.  This project really highlights how the different Polkadoodles stamp sets work together.

I look forward to seeing your projects this month.  Happy Crafting!

Gabrielle

Thursday, July 28, 2022

It's a monster photobomb!


When I saw the Polkadoodles 'Little Monsters' digi stamps I thought they looked like they could be such good friends so I decided to create them in a Best Friends Forever photo pose.  On my PC, I manipulated the three digi stamps ‘Tubatha’, ‘Fuzzpea’ and ‘Wheelieshirl’ to look as if they were in a huddle with Fuzzpea bouncing up from behind.  I coloured them using Promarkers and Polychromo pencils and then fussy cut.  I used a co-ordinating background paper from the ‘Little Monsters printable papers digi kit’.  To create the frame I simply cut an aperture in A4 cardstock to fit.  I used a label maker to create the sentiment.

I hope you like this card and I look forward to seeing your makes this month.

Happy Crafting!

Gabrielle


Polkadoodles Products used

‘Fuzzpea’ digi stamp

‘Tubatha’ digi stamp

‘Wheelieshirl’ digi stamp

Little Monsters printable papers digi kit


Promarkers –  Antique Pink, Black, Blush, Bright Green, Cool Grey 3, Orchid, Pumpkin, Soft Green, Tulip Yellow, Yellow,

Faber Castell Polychromos pencils

Sunday, May 29, 2022

Serenity Blossom Mixed Media Canvas


 Hello crafters, for this month’s DT project for Polkadoodles  I used the beautiful Serenity Blossom digi stamp.  There was something about her expression that I found very mischievous, so I had to use the ‘The Fairies made me do it’ sentiment from Serenity Fairy Wishes Sentimentals - Digital Craft download bundle.

To start, I sprayed the canvas board with inks, drying between layers.  Once dried, I applied a sparkly embossing paste through Polkadoodles ‘Starry Nights’ stencil.  I wanted the fairy to be in a fairy glen, so I used mushroom digi stamps from Lily Bug Love digis bundle kit, manipulating them on my PC to flip the perspective and overlay them together.  I then coloured the mushrooms and the main image with Promarker pens, Polychromos and a white pen to add highlights.  I used a grass die to create texture and ground the central image

Once I had assembled my composition, I applied Diamond Dust glitter and stickles to add a bit of sparkle.

I loved creating this piece and I hope you like it.  Happy crafting,

Gabrielle


Polkadoodles products used

Serenity Blossom digi stamp

Serenity Fairy Wishes Sentimentals - Digital Craft download bundle

‘Starry Nights’ stencil


Other Products used

Cosmic Shimmer Diamond Dust glitter

Distress Oxide Spray – Kitsch Flamingo

Dylusions Ink Sprays – Laidback Lilac, Lemon, Lime, Royal Blue

Promarker pens – Amethyst, Berry Red, Blossom, Grass, Lime Green, Magenta, Orchid, Pastel Pink, Poppy, Purple Violet

That’s Crafty Holographic Fine Texture Paste

Stickles – ‘Star Dust’

Friday, May 13, 2022

Explore the Wildflowers Cleverprints project using masking technique and a muted colour palette

 Hello crafters!  For today's DT post for Cleverprints I wanted to create a card with a muted and simple colour palette to showcase the beautiful designs within the stamps.  I chose to use the large flower design and sentiment from the  Explore the Wildflowers stamp set, two of the smaller background stamps from the  Floral Twist stamp set and the Shape Fun stencil.


To start, I stamped the main image in the centre of a piece of super smooth card using VersaFine Clair ink in 'Nocturne' which is a very true black.  I then stamped the image again on to a sheet of mask-it, cutting it out and placing it directly over my stamped card. This is so that I could create the background without any of the colour transferring to my stamped image as I wanted to keep it white.


Next, I chose my colours for the background and starting with the 'Worn Lipstick' Distress Ink, I blended around the masked image using a blending brush.  I then repeated the process using 'Gathered Twigs' Distress Ink, going very gently so as not to put too much colour on the card.  

Still keeping the mask in place, I laid the stencil over the top and stenciled through it with 'Tea Dye' Distress Ink.


To finish, I stamped the background stamps in black over the top.  I then removed the mask, stamped the sentiment and mounted on to Kraft Card.  I was really pleased with how the background makes the lovely stamp design pop.


Sunday, May 8, 2022

Gnometastic Strawberry Dream


Strawberries and cream is one of my favourite things about this time of year and the inspiration for my latest DT project for Polkadoodles.  I die cut ‘Gnometastic Strawberry Dream’ using a die from Cleverprints Wiggle Tags #2 die set and then coloured it using Polychromos pencils and a white gel pen.  I edged the image using ‘Tea Dye’ Distress ink and a black gelly roll pen and added white dots, gem stickers and liquid applique in white on to the cream spilling out of the jug.  

I used a sentiment from ‘Lets Hang Out - Winnie download bundle’ which I cut using deckled edge scissors to match the main shape and edged it in black.  I backed the topper on to a red polka dot cardstock from the ‘Winnie Wednesday Halloween Bundle’, die cut using the Cleverprints Wiggle Tag die set and edged it in black.  As a final touch, I added a matching piece of gingham ribbon for that picnic vibe.

I hope you like this tag and I look forward to seeing your makes this month.

Happy Crafting!

Gabrielle

Polkadoodles Products used

‘Gnometastic Strawberry Dream’ digi stamp

‘Lets Hang Out - Winnie download bundle’

‘Winnie Wednesday Halloween Bundle’


Other products used

Faber Castell Polychromos pencils

Cleverprints ‘Wiggle Tags’ #2

‘Tea Dye’ Distress Ink

Sakura Gelly Roll pen 08 & Black

White liquid applique

Saturday, April 30, 2022

Spring Hedgehog Gnome


Spring is in the air!  For this Polkadoodles DT project, I was inspired to use the ‘Spring Hedgehog Gnome’ to create a joyful card.  I coloured the main image and the bees with Promarkers and pencils and then stamped and coloured the flowers from the ‘Flower Power 1’ stamp set.

To make the grass I used the ‘Great Outdoors’ stencil with two shades of green distress ink and then fussy cut.  I created the card blank using a matching digi paper from the ‘Spring Gnomes’ paper pack and I then attached a piece of strong acetate to the front.  I assembled my composition using foam pads for dimension, adhering the bees on to the acetate to create the illusion that are flying freely around the gnome.

I hope you like this card and I look forward to seeing your makes this month.

Happy Crafting!

Gabrielle


Polkadoodles Products used

‘Spring Hedgehog Gnome’ digi stamp

‘Spring Gnomes’ printable paper patterns

‘Winnie Sunshine Delights’ Embellishments Bundle

‘Great Outdoors’ stencil

‘Flower Power 1’ stamp set

Promarkers – Cinnamon, Cocoa, Cocktail Pink, Cool Grey 1, Forest Green, Lipstick Red, Magenta, Pastel Beige, Pastel Blue, Shale, Yellow Antique Pink, Blossom,

Faber Castell Polychromos pencils

‘Mowed Lawn’ and ‘Peeled Paint’ Distress Ink

Sakura 08 Gelly Roll pen

Monday, April 18, 2022

'Lil Miss Sugarpops' Polkadoodles DT project


Hello crafters! For this colourful easel card I used the cute little ‘Unicorn digi stamp - Lil Miss Sugarpops’ which I combined with the stars and rainbow from the Accessories Digital Stamps - Sparkle Unicorn digital download bundle.

To start, I chose a spotty background paper from the ‘Rainbow Paper printable digital download bundle’ and selected a matching combination of Promarkers and Copics in which to colour my images.

I selected some mdf letters to spell ‘Shine’ and painted them with acrylics in similar colours.

I then chose an oval die for the shape of my easel card, folding and scoring a piece of pink card stock from my stash and die cutting it through both layers, with the edge of the die over the edge of the score line so the 2 ovals remained joined when cut.  I then scored one of the ovals in half across the middle. 

Next, I die cut a larger oval in the same colour card to create my matte and a smaller layer from the spotty background paper, sticking this over the bottom half of the scored oval.   Finally I assembled my layout with a combination of wet glue and foam pads.

I look forward to seeing your projects and happy crafting!

Gabrielle


Polkadoodles products used:

Unicorn Digi Stamp – Lil Miss Sugarpops

Rainbow Paper printable digital download bundle

Accessories Digital Stamps - Sparkle Unicorn digital download bundle.


Other products used:

Copics – Bareley Beige, Chamois, Pinkish White

Promarkers – Amethyst, China Blue, Cool Grey 2, Cyan, Lime Green, Magenta, Peach, Rose Red, Tulip Yellow, Yellow

Sakura Gelly Roll – Clear Star, 08

Creative Expressions – Noble Collection Double Stitched Ovals Dies

DecoArt Traditions – Quinacridone Violet

Dylusions Paints – Laidback Lilac, Leon Zest, London Blue, Sour Appletini


Sunday, March 27, 2022

Ula be a Unicorn Polkadoodles DT Project


Hello crafters! I thoroughly enjoyed creating my latest Design Team project for Polkadoodles Polkadoodles using the lovely ‘Ula be a Unicorn’ digi stamp which I coloured using Promarkers, Copics and Sakura Gelly Roll pens, and die with Spellbinders ‘Labels Eight’ die. I then stamped flowers from the Polkadoodles ‘Flower Power 1’ stamp set with a black ink and coloured using the same shades of Promarkers. I used a black pen to create a dotted border which helps draw the eye to the main image.

I created the background by covering a circular board with a co-ordinating patterned paper from the Rainbow Paper printable digital download bundle which I edited on my computer to soften the colour and fade the edges. I then embossed around the edge with Cosmic Shimmer ‘Lapis Pearl Lustre’ powder.

I die cut the sentiment from ‘Ula be a Unicorn’ and using Hunkydory Moonstone Star die, edging it with a Promarker pen. I stencilled small stars with the Polkadoodles ‘Starry Nights’ stencil and ‘Squeezed Lemonade’ Distress Ink to add detail and interest.

Finally, I added small embellishments from my stash, including chipboard flowers which I coloured using embossing powders so they would softly coordinate with the project.

I hope you like my project and happy crafting!

Gabrielle

Polkadoodles products used:

Ula Be a Unicorn- Life Journal craft digi download

Rainbow Paper printable digital download bundle

‘Flower Power 1’ stamp set

‘Starry Nights’ stencil

Other products used:

Copics – Bareley Beige, Chamois, Pinkish White

Promarkers – Blossom, Cool Aqua, Lilac, Lime Green, Rose Pink, Soft Green, Vanilla

Sakura Gelly Roll – Clear Star, 08, Black

Embossing Powders – Cosmic Shimmer ‘Lapis Pearl Lustre’, Distress Embossing Glaze ‘Salvaged Patina’, Moon Glow ‘Scotch Broom Yellow Red’, Nuvo ‘Ballerina Pink’

Distress Ink – Squeezed Lemonade

Spellbinders Labels Eight die set

Hunkydory Moonstone Stars die set

Sunday, March 13, 2022

Oddella Heart


Hello crafters, for this project for Polkadoodles, I was inspired to use the ‘Oddella Heart’ digi stamp; we don’t have to tell people we love them just on Valentine’s Day, right?  I coloured the image with Polychromos Pencils and then die cut using ‘Labels Eight’ Nestabilities Dies from Spellbinders, edging it with ‘Fired brick’ Distress Ink.  I then die cut two of the scribble heart dies from the Sizzix ‘Scribbles and Splat’ die set from red card stock. 

I selected a monochrome flower paper from the ‘Octavia Moonfly Paperheaven 5’ collection, cutting it to fit an A5 card blank and edging it with a black Promarker pen, and on a second piece, I tore a thick strip, and again used ‘Fired Brick’ Distress Ink to enhance the torn edges along with a sentiment from the ‘Let’s Hang Out Sentiments Bundle - Winnie download bundle’.

Happy crafting!

Gabrielle

 Polkadoodles Products used

‘Oddella Heart digi stamp
 ‘Let’s Hang Out Sentiments Bundle - Winnie download bundle’
‘Octavia Moonfly Paperheaven 5’


Polychromos Colour Pencils
Promarkers – Black
Ranger ‘Fired Brick’ Distress Ink
Sizzix  ‘Scribbles and Splat’ die set
Spellbinders ‘Labels Eight’ Nestabilities Dies

Sunday, February 27, 2022

Oddella Fairy mixed media tag


Hello crafters, for this month’s Polkadoodles DT project, I was inspired to use the quirky ‘Oddella Fairy’ digi stamp as I thought the image was perfect for a mixed media project.  To start, I cut and coloured the image with Promarkers and Polychromos Pencils, choosing to work with purples and greys for a more gothic feel, sizing her to fit on a 9.5” tag which I cut from recycled packaging. 

To create texture, I used ‘Distress Texture Paste’ through the Polkadoodles ‘Going Batty’ stencil and cut out 2 bats from the ‘Bat Crazy’ die by Sizzix,  I then cut some random shapes out of card scraps, including gate post shapes, circles and leaves, painting the whole lot, including the tag, in black gesso. 

Once dry, I assembled my composition of shapes on to the tag, without sticking anything down at this stage.  Once I was happy with the composition, I added additional mental embellishments, thick cotton, 3D balls and more texture paste.  I then stuck all the elements down with multi-purpose medium and reapplied black gesso to make sure there was an even covering.

To really bring out the texture, I used metallic waxes in shades of silver, purple and blue over the tag and sprayed seam binding ribbon in ink, fraying the edges to give it a distressed look.  Finally, I secured the fairy used multi-purpose medium and added a sentiment from the ‘Let’s Hang Out Sentiments Bundle - Winnie download bundle’.  I really enjoyed making this month’s project and I hope you like it.

Happy crafting!

Gabrielle

 Polkadoodles Products used
‘Oddella Fairy Ickyink Art alternative’ digistamp
‘Going Batty’ Stencil
‘Let’s Hang Out Sentiments Bundle - Winnie download bundle’


Other Products
Promarkers – Amethyst, Black, Bluebell,  Blossom, Cardinal Red, Cool Grey 3, 4 & 5, Lilac, Lime Green & Vanilla
Copics – Brown
Polychromos Colour Pencils
Sakura Gelly Roll – 08 & Clear Star
Sizzix ‘Bat Crazy’ die
Distress Texture Paste (Matte)
Black Gesso
Dylusions Ink Sprays – Balmy Night & Royal Blue
Metallic Rub-Ons – Sky Blue, Iris, Silver Blue & Golden White
Seam binding ribbon


Friday, February 25, 2022

Angel Heart

I had great fun in creating this mixed media piece using papers, stamps and a stencil, all from Cleverprints. I enjoy working with the different collections, putting them together to create fresh, new pieces. 

Thursday, February 17, 2022

Cleverprints Floral Crackled Hanging Sign

 Hello crafters!

I really enjoyed creating this mixed media hanging sign using the new 'Blooms Framed #1' dies from Cleverprints.  


Here is a list of what you will need:

'Blooms Framed #1' dies,
A wooden substrate of your choice,
Crackle medium of your choice,
Spatula,
Acrylic paints.  I used Paper Artsy chalk paint in 'Moon Light', Dylusions 'Crushed Grape'
Dolly Dimples mixed media card stock,
Spray inks.  I used Dylusions 'Blue |Lagoon', Laidback Lilac', 'Jade' & 'Teal', and Distress Oxide in 'Kitsch Flamingo', Mica Stain in 'Snowflake' and 'Hocus Pocus,
A cardboard box to protect your work surface,
Heat gun,
Gilding Flakes & glue,
A purple & white crayon,
decorative ribbon,
Glue,

The first step was to apply an even coat of my darkest paint to my wooden sign.


Once the paint was dry, apply the Crackle medium.  I used a spatula.


Whilst I was waiting for this to dry thoroughly, I started to make my flowers using my spray inks.  I placed my card in my cardboard box and  sprayed one piece of card with the blue and colours and another piece with the pink and purple colours.  I used a heat gun between layers to stop the colours from blending together too much, but encouraged drips and splodges!  I kept all the flower centres to use in the design, too.


Next, I repeatedly cut out the flower shapes from the die.  Cut out more than you think you will need as you can always use them on another project if you don't end up needing them all.

Once my wooden sign was dry, I painted over it with my lighter paint.  The colour of the darker paint underneath would then show through the cracks.  When this was dry, I highlighted the cracks further by going over them with my purple and white crayons, rubbing it in with my finger.


Now it is time to create your composition.  I didn't stick anything down until I was happy with the design, plus I would then know where I wanted the gilding flakes to be.  I took photographs at sach stage of the composition so that I could refer to the images when I was ready to glue.


I then applied my gilding flakes and adhered all my flowers, and wrapped a decorative ribbon around the string.


I hope you like this project, I certainly had great fun in making it!

Happy Crafting!


Sunday, February 13, 2022

Ula - Be a Mermaid Canvas


I absolutely adore mermaids, so was delighted to work with the ‘Ula Be a Mermaid’ digi stamp from Polkadoodles  for this mixed media canvas.  I coloured the image with Promarkers and added additional sparkle using ‘Waterfall’ and ‘Star Dust’ Stickles.  For the background, I randomly cut some seaweed shapes from copier paper and placed over a plain canvas to use as masks.  I then sprayed the canvas using Dylusions Inks in ‘Blue Lagoon’, ‘Teal’ and ‘Island Parrot’, moving the masks between layers and dabbing off some of the ink with paper towel to create texture.  I then added a part of the corresponding sentiment and glossy accents for bubbles.

Happy Crafting!

Gabrielle, The Papercrafting Pixie


Polkadoodles Products used

Ula be a Mermaid – Life Journal Craft digi download image (image and sentiment)


Promarkers – Blossom, Bluebell, China Blue, Cool Aqua, Gold, Lilac, Pastel Pink, Rose Pink, Tulip Yellow, Vanilla

Copics –Pinkish White

Dylusions Ink Sprays – Blue Lagoon, Island Parrot, Teal

Glossy Accents

Stickles – Star Dust, Waterfall


Tuesday, February 8, 2022

Art Makes Me Happy

I really enjoy going through my stamps and playing with images I've not used for a while and combinining them with new items. For this card I used the cute 'Polly Petals' stamp and 'Abstract Geometry' die set from Cleverprints with my new Jane Davenport Mermaid Markers. The sentiment, which is part of the same stamp set, was perfect for this bright and cheerful design. 

Sunday, January 30, 2022

Ula Create Journal Tag

For this Polkadoodles DT project for the 'We Love to Create' blog challenge, I was inspired to use the ‘Ula Create – Life Journal’ digi stamp, which I coloured with Promarkers. Ula is very keen on journaling so she needed to be sat on top of a pile of wonderful, inky and creative art journals. I used the books from the ‘Cupcake on pile of books’ digi stamp to create this effect, which I coloured, fussy cut and decoupaged to create depth and dimension. 

 I cut a large tag shape from 300gsm plain card stock and covered it using a background paper from the ‘Winnie Wonderland Paper Heaven 8’ bundle which has a subtle text pattern. I edged the tag with Craftynotions ‘Pink Sapphire’ jewel enamels embossing powder and stamped one edge with the ‘Queen of Hearts Collage’ stamp. I love this stamp as it has so many elements to it. I embossed it using WOW! ‘Gold Rich Super Fine’ powder. I then roughly tore purple flowers from the ‘Winnie Wednesday Halloween Bundle’ paper pack, edging them with ‘Dusty Concord’ Distress Ink. I applied the same ink to the sentiment from the ‘Ula Create – Life Journal’ digi stamp set. 

 I selected a purple ribbon from my stash which I also stamped and embossed in gold, using the ‘Queen of Hearts Collage stamp’. 

I hope you enjoyed this project and I look forward to seeing your makes this month. 
Happy Crafting! 
Gabrielle 

 Polkadoodles Products used:
 Ula Create – Life Journal digi stamp & sentiment
 Cupcake on Pile of Books digi stamp
 Winnie Wonderland Paper Heaven 8 Bundle
 ‘Queen of Hearts Collage’ stamp set
 Winnie Wednesday Halloween Bundle

 Promarkers – Antique Pink, Blossom, Cardinal Red, Grass, Pastel Pink
 Copics – Bareley Beige, Brown, Champagne, Light Walnut, Pinkish White 
 ‘Dusty Concord’ Distress Ink 
 Crafty Notions Jewel Enamels ‘Pink Sapphire’
 Sheena Embossing Powders WOW! ‘Gold Rich Super Fine’

Friday, January 28, 2022

Take Time to Smell the Flowers

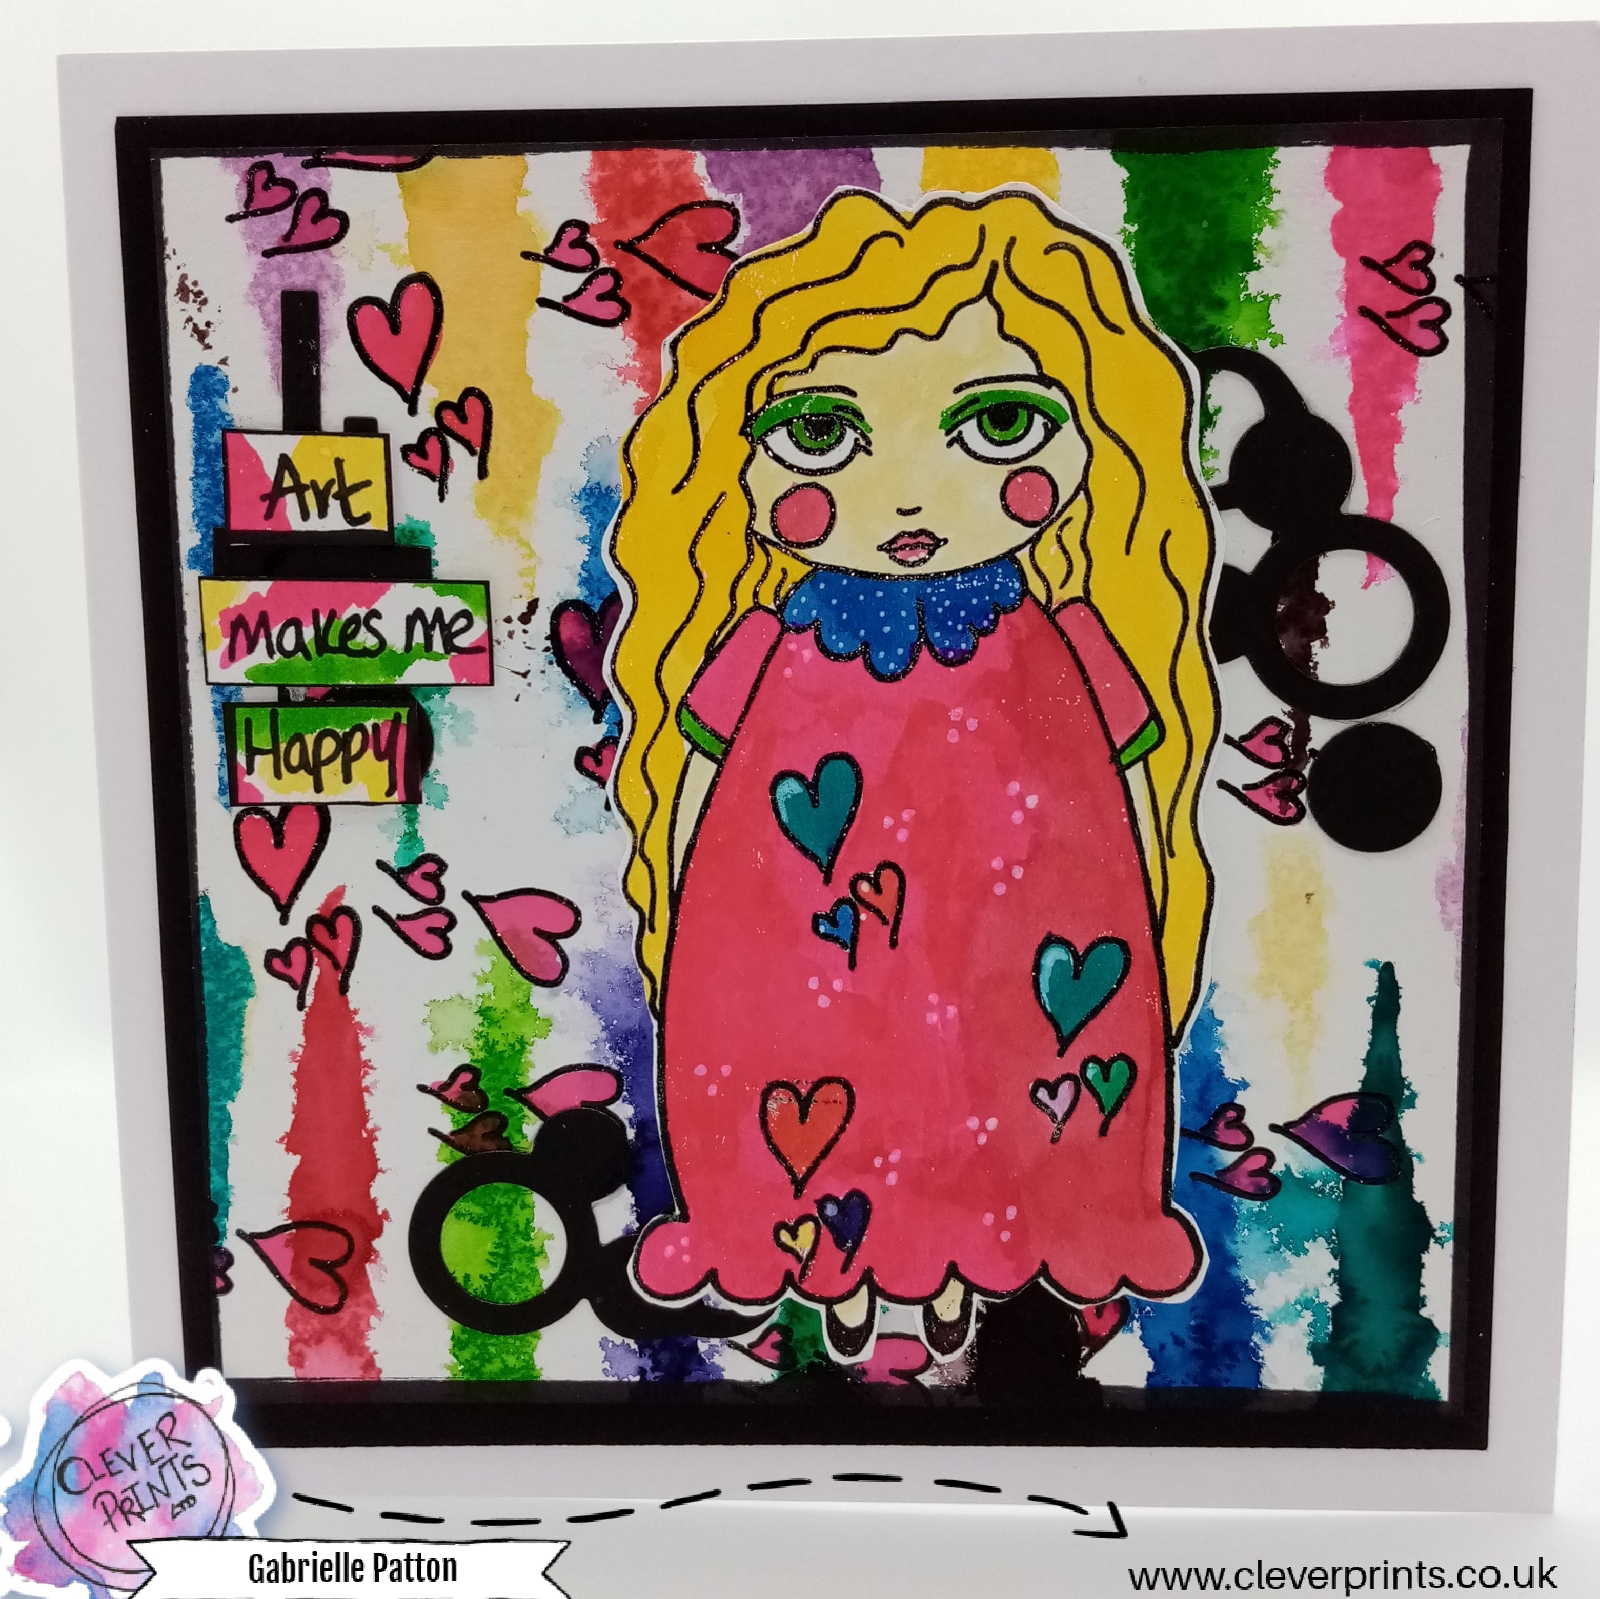
Hello crafters! Today I am sharing a bright and cheerful card using some of the beautiful stamps from the new 'In the Garden ' range by Cleverprints, one of the new stencils and Distress Oxide sprays and ink pads.
Here is what you will need: 
Cleverprints stamps: 'Explore the Wildflowers', 'Where the Wildflowers Grow' and 'Floral Twist', Cleverprints stencil: 'Flower Fall', 
Mixed Media card stock - I used Dolly Dimples cut to 6.75" x 4.75",
a 7" x 5" card blank, 
card stock for stamping, 
a colour wheel, 
Distress Oxide sprays: 'Scattered Straw', 'Kitsch Flamingo' and 'Salvaged Patina', 
Distress Ink pads: 'Squeezed Lemonade', 'Kitsch Flamingo' and 'Salvaged Patina', 
blending brushes, 
a journal or journal paper, 
Alcohol pens - I used Promarker pens choosing similar shades to my inks,
a white gel pen, 
Scotch Removable tape, 
two small pieces of acetate - to use as masks so they only need to be a little bigger than your card stock, Memento ink in 'Noir', 
a paper trimmer, 
a stamping platform, 
ruler, 
pencil and rubber,
foam pads, 
glue, 
an old cardboard box, 
a heat tool 
a water spray bottle. 

For this card I wanted to work with a triad of colours, similar to the primaries, but I wanted more pastel tones, so I chose a pink, pale yellow and a soft blue/green. If you are not sure, colour wheels are really useful at seeing which colours work well together.
To make the background I measured along the long edge of the mixed media card stock, making a light pencil mark at each 2.25" point. I then lightly drew a line down edge to edge to mark the three equal sections to use for each of my colours.
This is where the acetate and removable tape comes in. This is optional, but I chose to use this as I wanted my three colours to not blend in to each other. Starting on the left side of the card, place the acetate over the middle and right sections you have marked and apply the tape down the pencilled line, so only the left of the three sections is uncovered. Laying the card flat in an old cardboard box, spray the top part of the card with your first colour and then tip it up to allow the colour to drip down. Have a journal or journal paper underneath to catch the drips and sprays; this can be the start of a future journal page and doesn't waste any ink.
Carefully remove the tape and acetate and dry with a heat tool, you can create splatters with water once dry to activate the oxide. Clean the acetate to remove any ink and dry. You are now ready to do the second colour. Repeat the process with the acetate and tape, but this time, use both pieces of acetate so the left and right sections are covered and the middle section is exposed. Spray your second colour and allow it to drip. Again, remove the tape and acetate and dry.
You are now ready for the final section, repeat the process covering the two coloured sections. Once completely dry, gently rub out any pencil lines and place your stencil over the background and apply Distress ink through the stencil with blending brushes, being careful to apply the ink colour tone on tone, this will create a very subtle effect. Then edge around the card in black ink.
Colouring your Images Stamp and colour your images using your chosen colouring mediums, I did each one twice. I often do this as it gives me options for either future projects or to decoupage an image. In this project I decided to decoupage the centre parts of the two smaller flowers and the centre leaf on the larger flower. To create shade, blend two shades each colour, I find it easier to start with the lighter of the two colours, then blend the darker colour and then go back over the whole area with the lighter shade again. Use the white pen to create highlights.
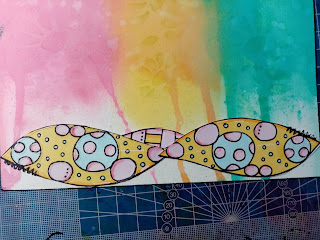
Once you have finished your colouring, cut out your images. I often play around with composition before sticking anything down, including laying the sentiment stamp on to the card to see where it suits the design. Don't be afraid to cut your stamped and coloured images, I did this to create the hills.
Once you have found a composition you like, it is a good idea to take a photograph, that way you can still move things around without the worry of forgetting a design that you liked. Once I have found a composition I like, I place my card in my stamping platform and stamp my sentiment. If stamping directly on to a card, I always use a stamping platform, that way if I need to go over it again I know I can and get the stamp in the exact same spot. Stick down your elements and secure to the card blank. I hope you have fun making this card, working in threes with colours is so much fun!

Happy Crafting!
Gabrielle, the Papercrafting Pixie

Bright Eyed and Bushy Tailed stamped candle

  For this blog post for Cleverprints, I decided to decorate a candle using stamps.  This is something very simple to do which you can do wi...