Cleverprints stamps: 'Explore the Wildflowers',
'Where the Wildflowers Grow' and 'Floral Twist', Cleverprints stencil: 'Flower
Fall',
Mixed Media card stock - I used Dolly Dimples cut to 6.75" x 4.75",
a 7" x
5" card blank,
card stock for stamping,
a colour wheel,
Distress Oxide sprays: 'Scattered Straw', 'Kitsch
Flamingo' and 'Salvaged Patina',
Distress Ink pads: 'Squeezed Lemonade', 'Kitsch
Flamingo' and 'Salvaged Patina',
blending brushes,
a journal or journal paper,
Alcohol pens - I used Promarker pens choosing similar shades to my inks,
a white
gel pen,
Scotch Removable tape,
two small pieces of acetate - to use as masks so
they only need to be a little bigger than your card stock, Memento ink in 'Noir',
a
paper trimmer,
a stamping platform,
ruler,
pencil and rubber,
foam pads,
glue,
an old cardboard box,
a
heat tool
a water spray bottle.
For this card I wanted to work with a triad of colours,
similar to the primaries, but I wanted more pastel tones, so I chose a pink,
pale yellow and a soft blue/green. If you are not sure, colour wheels are really
useful at seeing which colours work well together.
To make the background
I measured along the long edge of the mixed media card stock, making a light pencil mark at each 2.25" point. I then lightly drew a line down edge to edge to mark
the three equal sections to use for each of my colours.
This is where the acetate and removable tape comes in. This is optional, but I
chose to use this as I wanted my three colours to not blend in to each other.
Starting on the left side of the card, place the acetate over the middle and
right sections you have marked and apply the tape down the pencilled line, so
only the left of the three sections is uncovered. Laying the card flat in an old
cardboard box, spray the top part of the card with your first colour and then
tip it up to allow the colour to drip down. Have a journal or journal paper
underneath to catch the drips and sprays; this can be the start of a future
journal page and doesn't waste any ink.
Carefully remove the tape and acetate and dry with a heat tool, you can create
splatters with water once dry to activate the oxide. Clean the acetate to remove
any ink and dry. You are now ready to do the second colour. Repeat the process
with the acetate and tape, but this time, use both pieces of acetate so the left
and right sections are covered and the middle section is exposed. Spray your
second colour and allow it to drip. Again, remove the tape and acetate and dry.
You are now ready for the final section, repeat the process covering the two
coloured sections. Once completely dry, gently rub out any pencil lines and
place your stencil over the background and apply Distress ink through the
stencil with blending brushes, being careful to apply the ink colour tone on
tone, this will create a very subtle effect. Then edge around the card in black
ink.
Colouring your Images
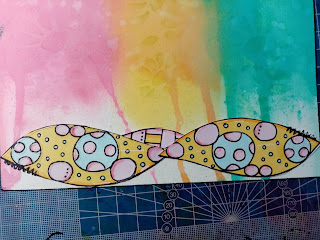
Stamp and colour your images using your chosen colouring mediums, I did each one
twice. I often do this as it gives me options for either future projects or to
decoupage an image. In this project I decided to decoupage the centre parts of
the two smaller flowers and the centre leaf on the larger flower. To create
shade, blend two shades each colour, I find it easier to start with the lighter
of the two colours, then blend the darker colour and then go back over the whole
area with the lighter shade again. Use the white pen to create highlights.
Once you have finished your colouring, cut out your images. I often play around
with composition before sticking anything down, including laying the sentiment
stamp on to the card to see where it suits the design. Don't be afraid to cut
your stamped and coloured images, I did this to create the hills.
Once you have found a composition you like, it is a good idea to take a
photograph, that way you can still move things around without the worry of
forgetting a design that you liked. Once I have found a composition I like, I
place my card in my stamping platform and stamp my sentiment. If stamping
directly on to a card, I always use a stamping platform, that way if I need to
go over it again I know I can and get the stamp in the exact same spot. Stick
down your elements and secure to the card blank. I hope you have fun making this
card, working in threes with colours is so much fun!
Happy Crafting!
Gabrielle, the Papercrafting Pixie


Really pretty card, great detailed post xx
ReplyDeleteThank you xx
DeleteBeautiful card,fab layout and colours, brilliant tutorial x
ReplyDeleteThank you so much xx
DeleteWhat a brilliant project - adore it.
ReplyDeleteThank you so much xx
ReplyDelete